Installation de cabanon : évitez les erreurs courantes | Guide expert
Do You Remember Michel, That Friendly Neighbor Who Built His Own Shed Last Summer?
The one who was so proud of his DIY project?
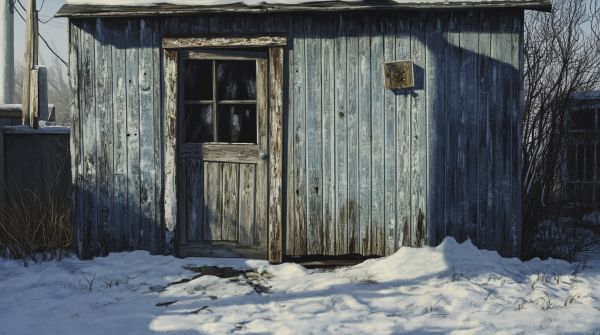
Six months later, the door no longer closed properly, the floor started to sag, and his brand-new cedar shed was already showing alarming signs of premature deterioration.
Unfortunately, this isn’t an isolated story. Every year, hundreds of homeowners in Quebec face similar issues after installing their sheds without following essential guidelines. What was supposed to last for decades starts deteriorating after just a few seasons.
When you think about it, a shed is a significant investment. Whether you use it to store gardening tools, park your lawnmower, or create an outdoor workspace, durability is key. Yet, many homeowners overlook critical installation steps, compromising the longevity of their structure.
The harsh Quebec winters—with their freeze-thaw cycles and heavy snow accumulations—put these structures to the test. A poorly installed shed can end up leaning, with jammed doors, a leaking roof, or, worse, a compromised structure requiring costly repairs.
The good news? Most of these problems can be avoided with proper preparation and some technical knowledge. Contrary to popular belief, installing a shed isn’t just about placing it on the ground and hoping for the best. It’s a process that requires careful planning and attention to detail.
In this article, we’ll explore the most common mistakes made during shed installation and how to avoid them. Our goal is to provide you with all the necessary information to ensure your shed remains sturdy, functional, and aesthetically pleasing for many years, standing up to the elements and the rigors of our northern climate.
Whether you're planning to install your shed yourself or simply want to understand the process to communicate better with professionals, this guide will be valuable to you. After all, the key to a successful installation lies in preparation, knowledge, and attention to detail.
Get ready to discover the secrets to a durable and hassle-free shed installation that will save you headaches and unnecessary expenses in the years to come.
The Crucial Importance of Ground Preparation: Are You Jeopardizing Your Shed’s Durability?
If you think installing a shed is just about picking a spot and placing your structure there, think again. Ground preparation is arguably the most crucial step in ensuring your shed’s longevity—and unfortunately, it’s also the most overlooked.
According to a recent study by the Quebec Builders Association, over 65% of structural issues with sheds are directly related to inadequate ground preparation. This alarming statistic highlights the importance of this fundamental step.
One of the most common mistakes is underestimating the impact of soil movement. In Quebec, where freeze-thaw cycles are particularly severe, poorly prepared soil can cause significant shifts in your shed’s foundation. In winter, the water in the soil freezes and expands, potentially lifting your structure. In spring, as the ground thaws, it contracts, causing the shed to sink. This repeated cycle year after year results in misaligned doors, jammed windows, and even structural cracks.
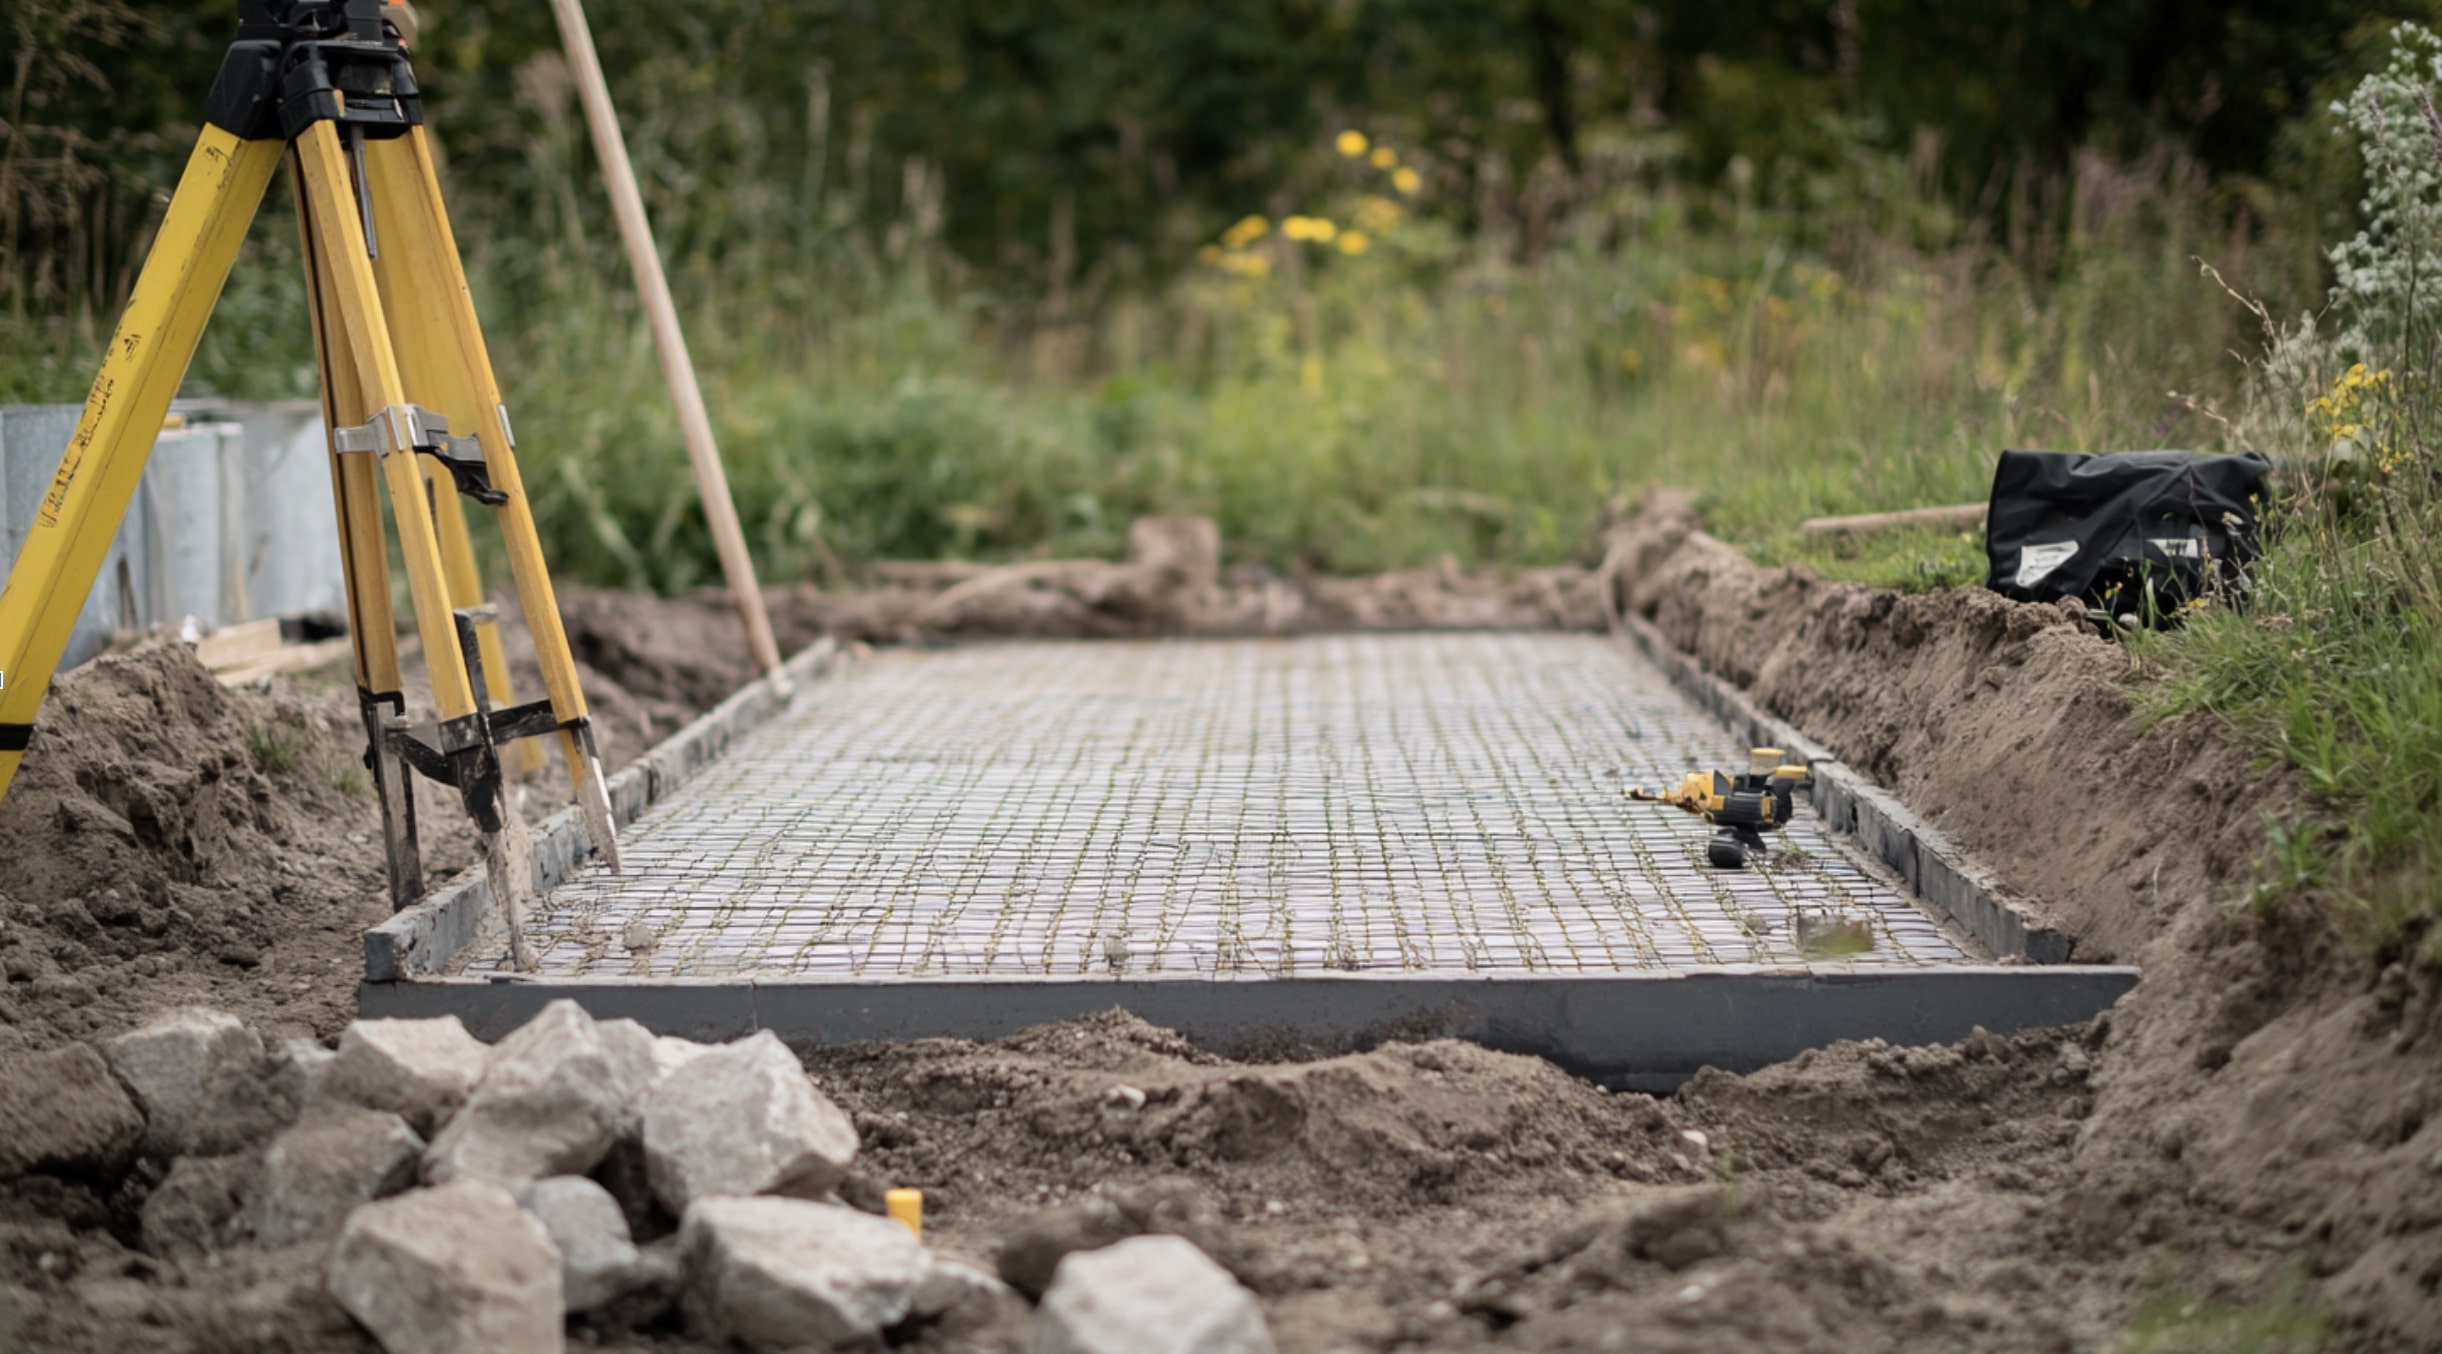
To prevent this issue, it’s essential to remove the topsoil layer to a depth of at least 15 to 20 cm. This soil, rich in organic matter, is particularly susceptible to temperature and moisture fluctuations. Replacing it with a compacted granular base (ideally 0-3/4" crushed stone) creates a stable, well-drained foundation.
Another frequent mistake is neglecting to level the ground. A shed installed on an uneven surface will experience uneven stress, eventually compromising its structural integrity. Using a laser level is highly recommended for achieving a perfectly level surface. If you don’t have access to one, a long straight board and a bubble level can do the job, though with less precision.
Drainage is also a critical yet often ignored aspect. Water pooling around or under your shed can cause significant damage, including wood rot and metal corrosion. To ensure proper drainage, your site should have a slight slope (around 1-2%) away from the shed. Additionally, installing a geotextile membrane beneath the granular base will prevent soil and root intrusion while facilitating water runoff.
Don’t forget that ground preparation must account for your shed’s weight. A standard shed can weigh between 700 and 1500 kg, or even more if it houses heavy equipment. An inadequately compacted base won’t support this load and will gradually sink. Using a vibrating plate compactor to compact the granular base is highly recommended.
Finally, one common oversight is neglecting local regulations. Before you even begin preparing the site, ensure you have obtained all necessary permits and comply with your municipality’s building codes. Some regulations may impose specific foundation requirements, especially in areas subject to extreme weather conditions.
By investing time and resources in proper ground preparation, you lay the foundation—both literally and figuratively—for a durable shed that will serve you reliably for many years.
Securing Your Shed: Why It Might Take Off Without Proper Anchoring
Imagine finding your shed toppled over after a strong autumn storm—or worse, seeing it displaced several inches after a harsh winter. These aren’t isolated incidents; they’re a reality for many homeowners who neglected the crucial step of securing their shed to the ground.
According to data from the Construction Research Institute, nearly 40% of sheds sustain significant damage within the first five years due to insufficient anchoring. This statistic underscores the critical importance of proper ground fixation.
The most common mistake in securing a shed is relying solely on its weight for stability. While this may seem adequate in calm weather, the extreme conditions we experience in Quebec—high winds, heavy snowstorms, torrential rains—can easily destabilize an unanchored structure. A standard shed offers considerable wind resistance, and the forces exerted during a storm can reach several hundred kilograms.
To counteract these forces, various anchoring methods exist, each suited to a specific type of foundation:
- For a concrete slab, expansion or chemical anchors provide a strong, durable hold. These anchors are inserted into drilled holes in the concrete and firmly secure the structure. It’s recommended to install at least four anchor points—one at each corner—and additional points for larger sheds.
- For sheds on concrete blocks or piers, “L” or “T” anchors can fasten the structure to its base. These should be installed at regular intervals, ensuring they are securely attached to both the shed and the foundation.
- For installations on compacted granular bases, helical piers are an excellent solution. These piers are driven deep into the ground, well below the frost line, providing exceptional stability. Their installation requires specialized equipment, but the investment is well worth it for long-term peace of mind.
Another frequent mistake is using inappropriate fasteners for outdoor conditions. Screws, bolts, and other fasteners must be galvanized, stainless steel, or specifically treated to resist corrosion. Moisture, temperature variations, and precipitation can quickly deteriorate standard fasteners, compromising the integrity of the anchor system.
The distribution of anchor points is also crucial. Asymmetrical anchoring can create uneven stress on the structure, especially in strong winds. Ensure anchor points are evenly spaced around the shed's perimeter, with special attention to corners and joint areas.
Regular inspections of the anchoring system are essential to maintain its integrity over time. Annually check that anchors remain firmly in place and show no signs of corrosion or wear. This simple check can prevent significant issues down the road.
By investing in an anchoring system suited to your foundation type and local climate conditions, you ensure your shed’s stability and durability, protecting your investment for years to come.
Essential Materials and Tools: Are You Properly Equipped for a Successful Installation?

The success of a shed installation largely depends on the quality of the materials used and the tools employed. Unfortunately, many homeowners try to cut costs on these crucial aspects, ultimately compromising the durability and stability of their structure.
According to a survey conducted by the Quebec Association of Building Material Retailers, nearly 53% of shed installation issues are related to the use of inadequate or low-quality materials. This statistic highlights the importance of investing in the right materials.
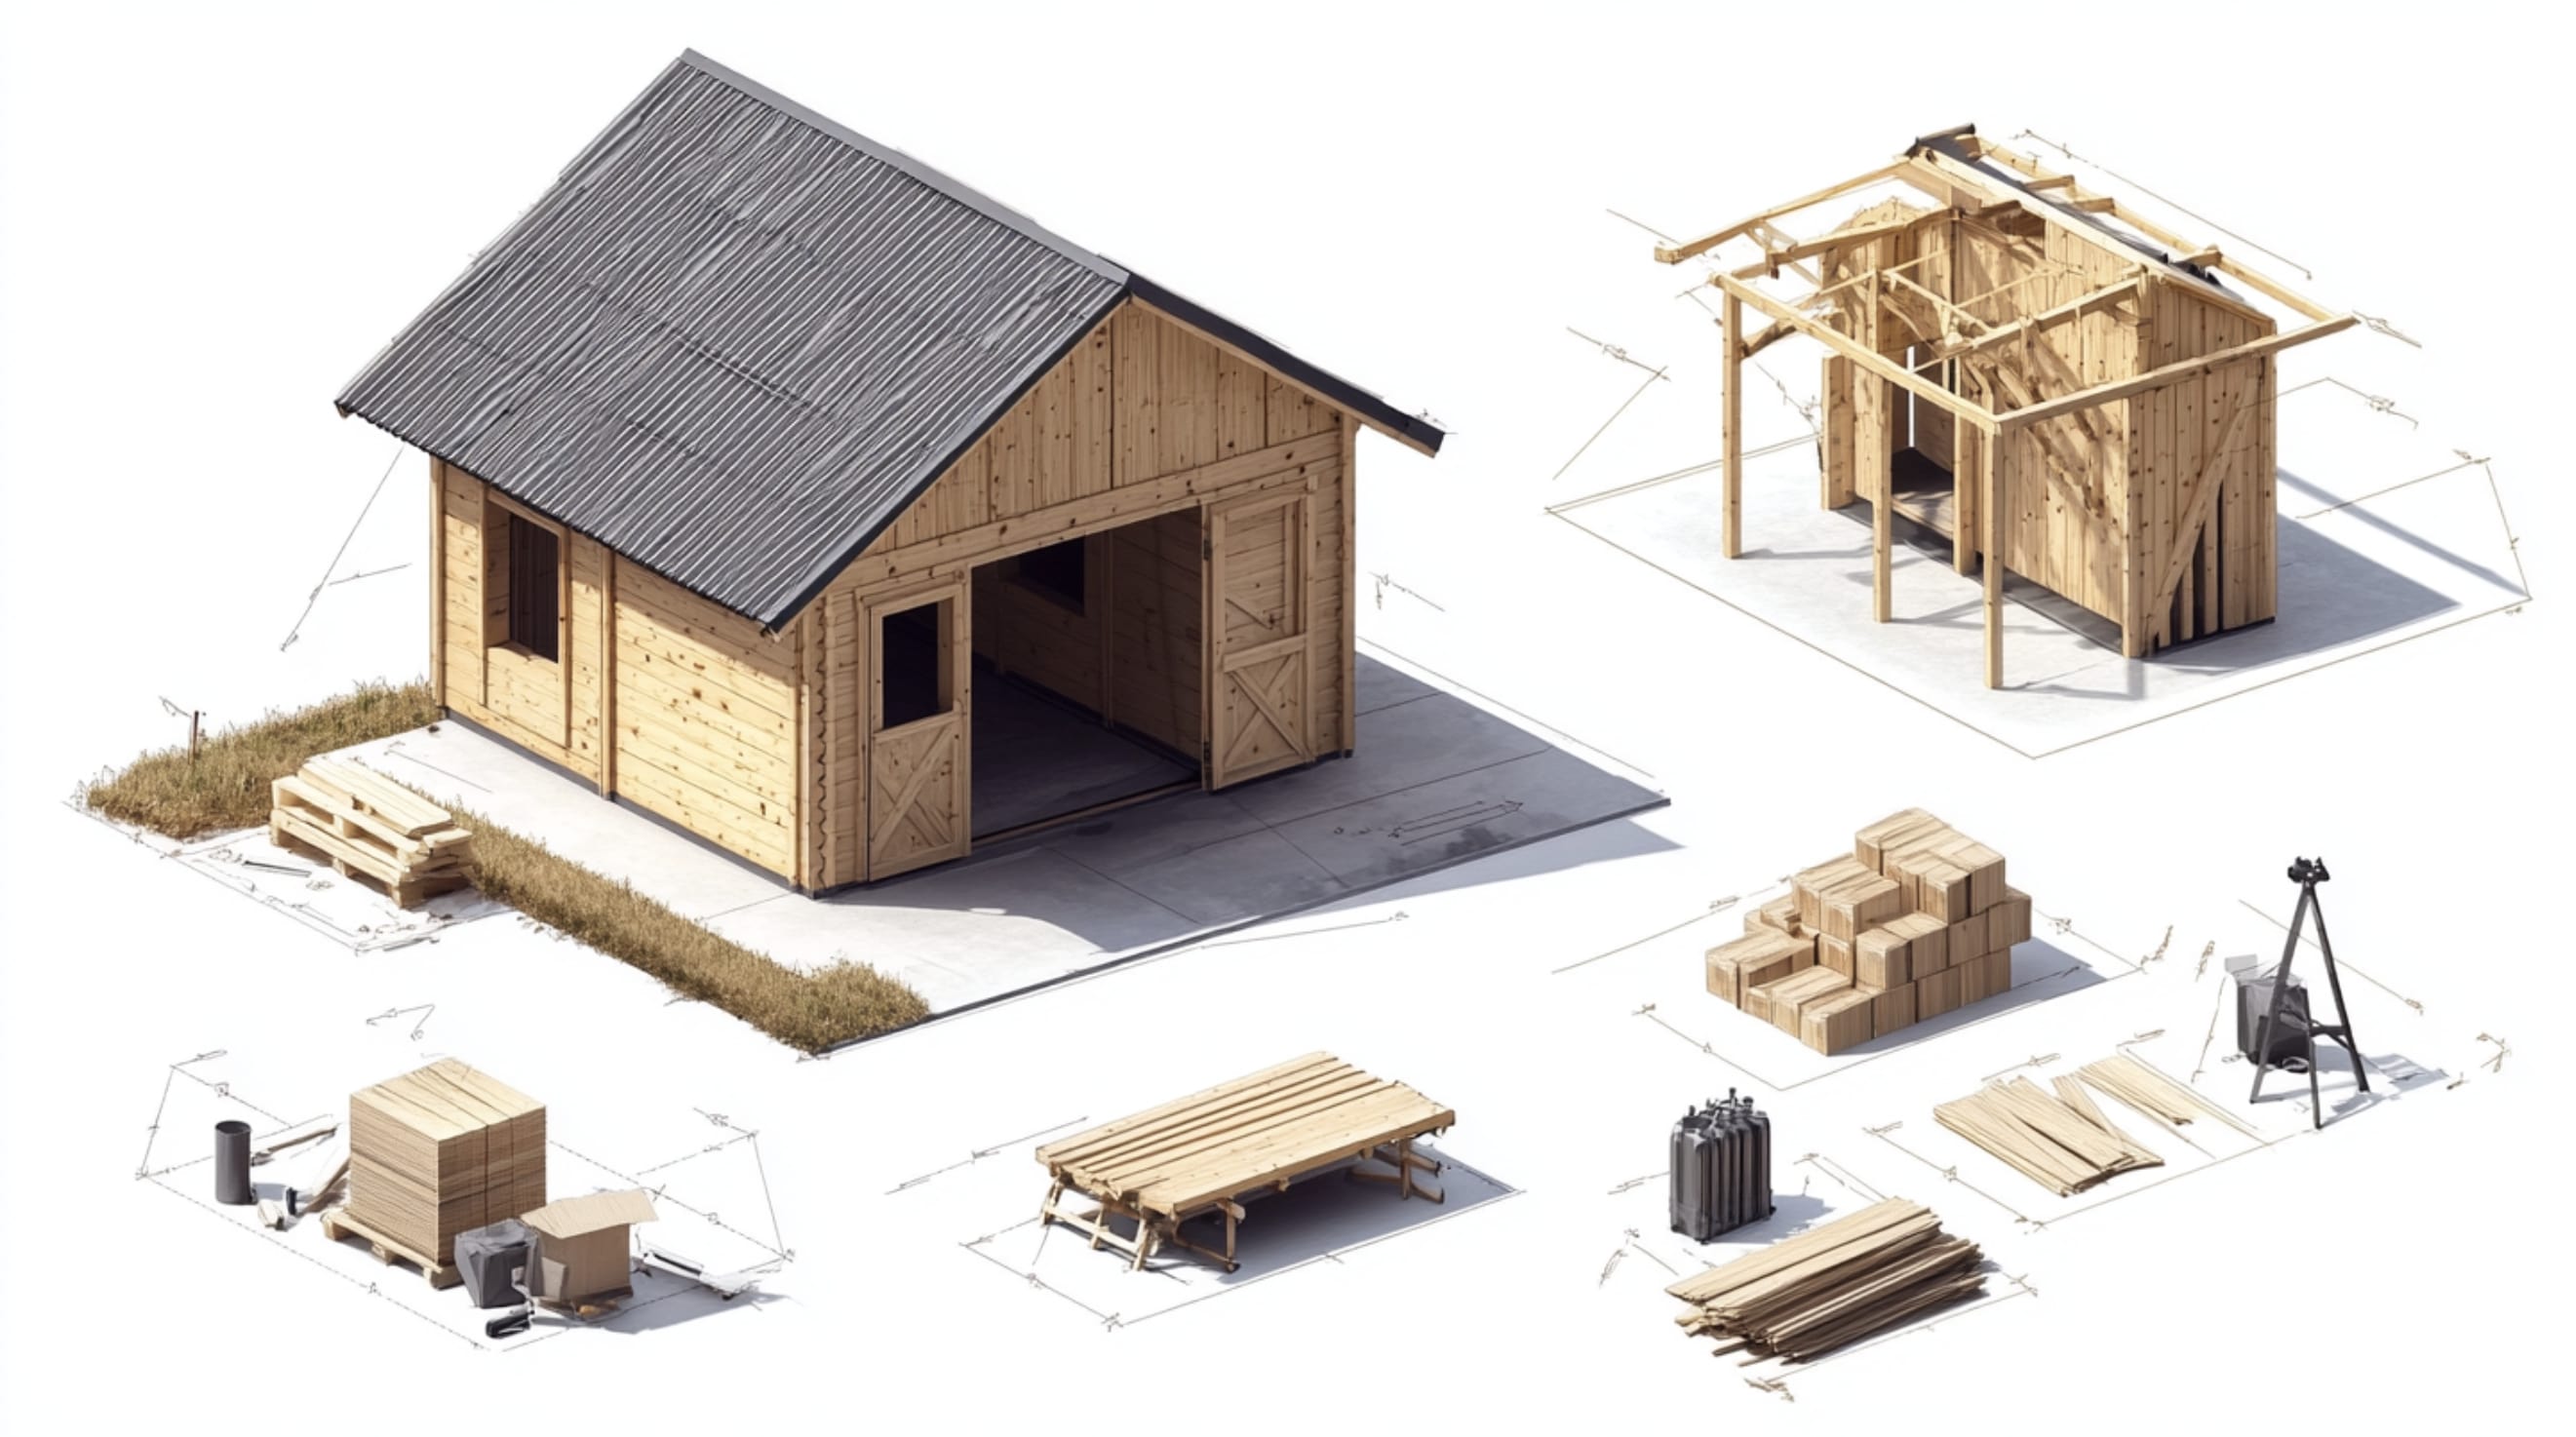
Let’s start with foundation and leveling materials. One of the most common mistakes is using regular soil or sand as a base for the shed. These materials retain moisture and are highly susceptible to freeze-thaw cycles, which will inevitably cause ground movement. Instead, you should opt for:
- A high-quality geotextile membrane to prevent weed growth and improve drainage.
- 0-3/4" crushed stone for the granular base (about 15 cm thick once compacted).
- Weather-resistant concrete or composite leveling blocks, rather than wooden blocks that may rot over time.
For anchoring, the materials used must be resistant to corrosion and extreme weather conditions. It’s best to choose:
- Galvanized or stainless steel anchors and fasteners.
- Helical piers certified for structural loads.
- Metal anchor straps instead of synthetic materials, which degrade over time.
Regarding the shed structure, if you’re assembling it yourself, make sure to use screws and nails specifically designed for outdoor conditions. Standard fasteners will oxidize quickly, causing unsightly stains and weakening the joints. The best options include:
- Self-tapping screws with an anti-corrosion coating.
- Hot-dipped galvanized or stainless steel nails.
- Exterior-treated metal connectors to reinforce key structural joints.
Now, let’s talk about the essential tools for a successful installation. Many homeowners underestimate the necessary equipment and attempt the process with inadequate tools. Here’s a list of must-haves:
- A rotary laser level to ensure perfect leveling (renting one is a cost-effective option).
- A plate compactor to efficiently compact the granular base (also available for rent).
- A 120 cm bubble level to check horizontal alignment.
- A powerful drill-driver with appropriate bits for different fasteners.
- A square shovel for ground preparation.
- A rake to evenly spread the granular base.
- A rubber mallet to adjust leveling blocks without damaging them.
- A trowel for masonry work if needed.
- A chalk line to mark the exact shed placement.
- A carpenter’s square to verify right angles.
A common mistake is neglecting personal protective equipment (PPE). Shed installation comes with risks that shouldn’t be underestimated. Be sure to use:
- Heavy-duty work gloves.
- Safety glasses, especially when cutting materials.
- Hearing protection when using loud tools.
- Steel-toe safety boots to protect your feet from falling objects.
Accurate measuring tools are also essential, as even a few millimeters of misalignment can cause structural issues. Invest in:
- A high-quality tape measure.
- A digital bubble level for precise measurements.
- A stud finder for locating structural elements when installing fasteners.
Lastly, weatherproofing materials are crucial for protecting your shed against moisture infiltration:
- A high-quality exterior sealant for exposed joints.
- A waterproofing membrane for critical areas.
- A specialized outdoor caulking for long-term durability.
By investing in high-quality materials and the right tools, you greatly improve your chances of achieving a long-lasting, problem-free installation. Remember, the cost of these investments is usually far less than the price of future repairs caused by a poorly executed installation.
The Critical Steps of a Professional Shed Installation: Are You Following the Right Order?
Installing a shed is a step-by-step process where each stage depends on the previous one. If the sequence is incorrect, even high-quality materials and the best tools won’t prevent issues down the road.
According to data from residential construction experts, about 45% of installation issues result from an improper work sequence. This statistic highlights the importance of following a structured and logical approach.
The first step, often overlooked, is obtaining the necessary permits. Before starting any work, ensure that you have:
- Checked local municipal regulations regarding shed placement.
- Obtained a building permit if required.
- Contacted utility location services (such as Info-Excavation) to avoid underground hazards.
- Reviewed your property’s site plan to comply with setback requirements.
Once the legal aspects are covered, detailed planning is crucial. Take the time to:
- Mark the exact shed location with stakes and string.
- Ensure the area is free of obstacles (tree roots, large rocks, etc.).
- Confirm proper drainage in the chosen spot.
- Plan the shed’s orientation for optimal access to doors and windows.
The next step is ground preparation, a critical phase that must be executed meticulously:
- Mark the work area, extending at least 60 cm beyond the shed’s footprint.
- Remove the topsoil layer to a depth of 15-20 cm.
- Lay down a geotextile membrane to prevent weeds and soil erosion.
- Spread an initial layer of crushed stone (about 10 cm thick).
- Compact it thoroughly with a plate compactor.
- Add a second layer of crushed stone (5-7 cm thick).
- Compact it again to ensure a stable, level surface.
A common mistake is insufficient compaction, which can cause sinking and misalignment over time. To prevent this, pass the plate compactor multiple times in different directions for optimal density.
When to Hire a Professional: Recognizing the Limits of DIY
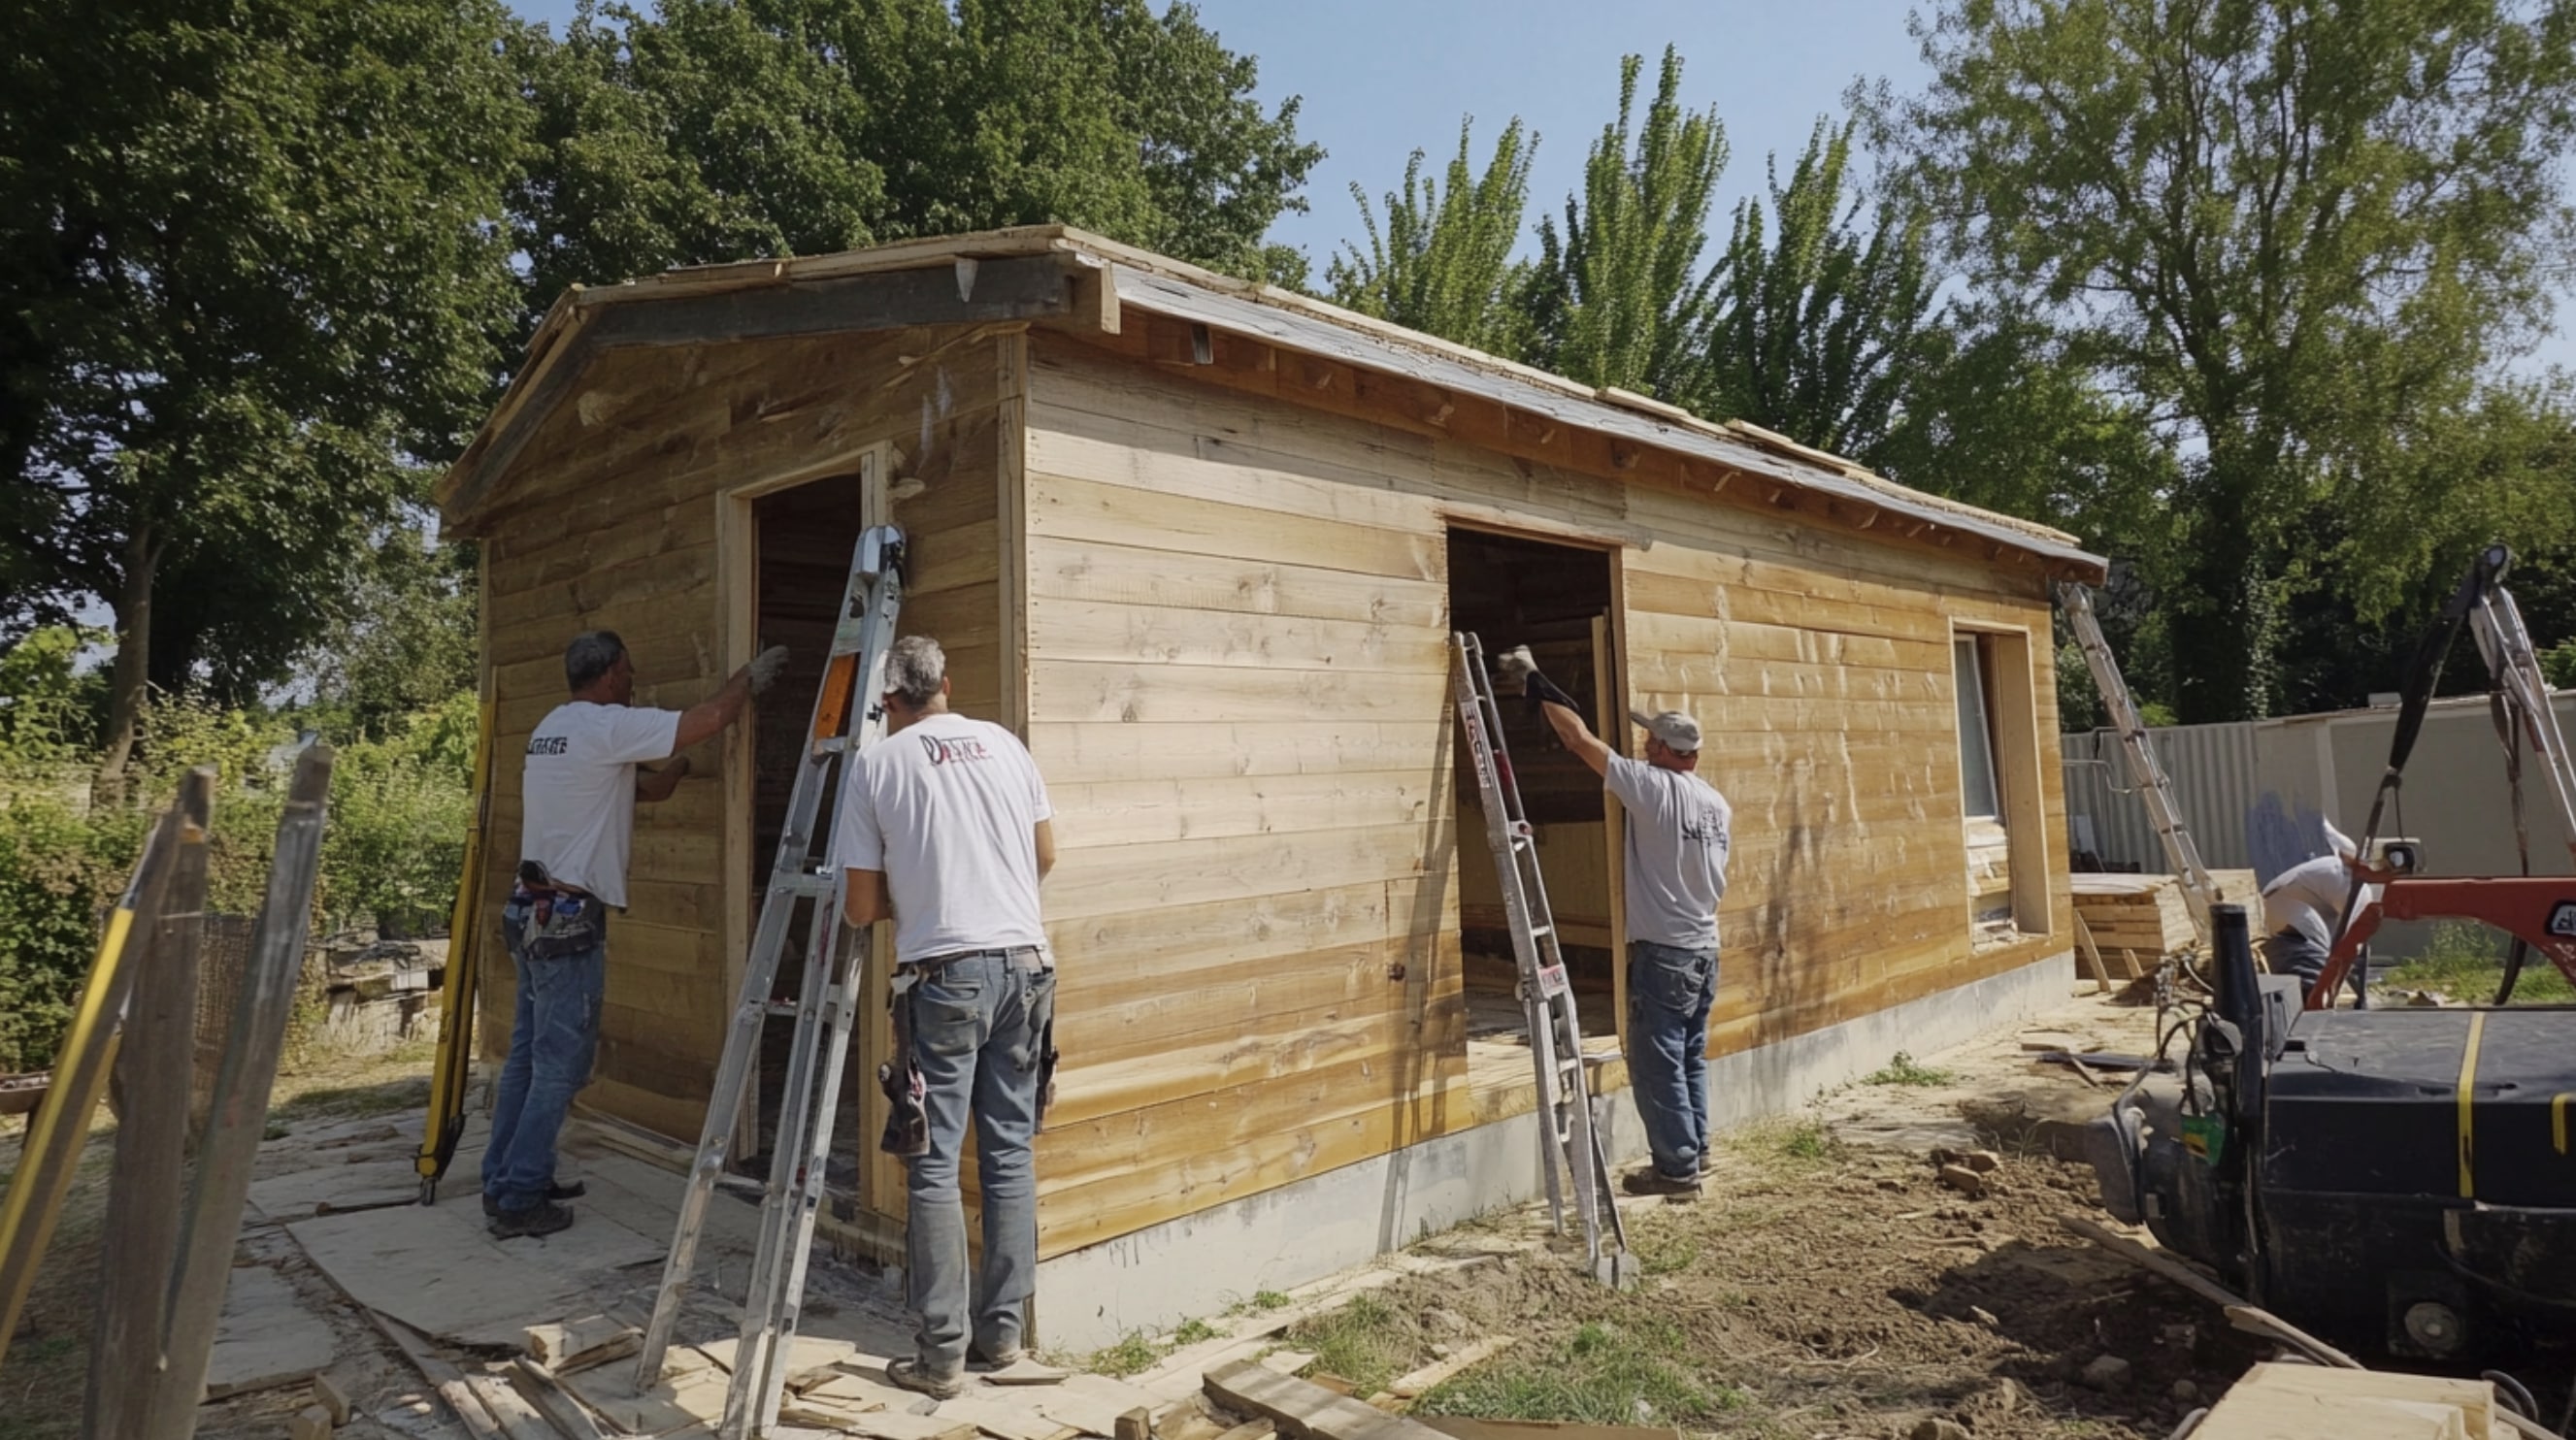
Shed installation may seem like a manageable DIY project, but it’s important to recognize when professional help is needed.
A survey of homeowners who installed their own sheds found that 72% encountered significant difficulties, and 38% regretted not hiring a professional for at least some steps. These numbers highlight the importance of an honest self-assessment of your skills.
Situations where professional expertise is strongly recommended include:
- Complex ground preparation (sloped, unstable, or rocky terrain).
- Permanent foundation work (such as a poured concrete slab or deep screw piles).
- Utility connections (electricity, plumbing), which require certified professionals.
- Large shed assembly (over 10 m²), which involves heavier materials and precision alignment.
- Strict local building codes, where compliance mistakes can lead to fines.
If you prefer to do some work yourself, you can still consult a professional to handle only the critical steps, such as:
- Ground preparation and foundation work.
- Anchoring and structural reinforcements.
- Electrical or plumbing installations.
At Cabanons Boyer, we offer various service levels to match our customers' needs. Whether you need a full-service installation or guidance for a DIY project, our team is here to help.
Final Thoughts: Ensuring a Successful and Long-Lasting Shed Installation
Installing a shed is a major investment that adds value to your property. By avoiding common mistakes, you maximize the likelihood that your shed will remain solid, functional, and aesthetically pleasing for many years.
Let’s recap the key takeaways:
✅ Proper ground preparation is the foundation of a successful installation.
✅ Adequate anchoring prevents storm damage and long-term shifting.
✅ High-quality materials and tools are essential for durability.
✅ Following a step-by-step installation process minimizes errors.
✅ Hiring a professional when needed can save you time and money.
At Cabanons Boyer, we offer top-quality sheds and professional expertise to ensure a smooth and lasting installation. Visit our website at https://www.cabanonsboyer.com for our full range of products and services.